When you have navigated to the desired position, you can extract the displayed image. This is precisely what ImageGrab is for. You can either copy it only to the clipboard, or save it to a hard drive or a system USB stick.
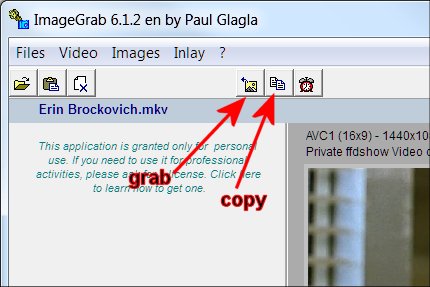
To copy the image to the clipboard, click on the Copy button, or type CTRL + C on the keyboard or use the Images / Copy command of the Menu.
To save the image in a file, click on the Grab button, or type F5 on the keyboard, or use the menu command Images / Grab.
If you click on the video, either it copies the image or it saves it, according to a parameter that can be defined in the Settings.

In all cases, the extracted image is displayed as a thumbnail on the right or left of the video (ALT + W to change). Under the thumbnail appears the name of the extracted image. If it is white, the image has only been copied. If it is green, the image has been saved. By clicking on the white name, the image is saved and therefore the name becomes green.
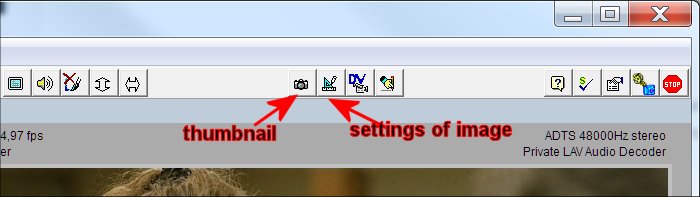
Before saving the images, you need to define the settings that will define how to save the image. This is done by displaying the panel to modify the saving of Images, with the corresponding button on the toolbar, the menu command Images / Settings of the Image or the keyboard shortcut F3. Note that you can return to the thumbnail display by typing F2, or the Images / Thumbnail menu command, or the Thumbnail button on the toolbar.
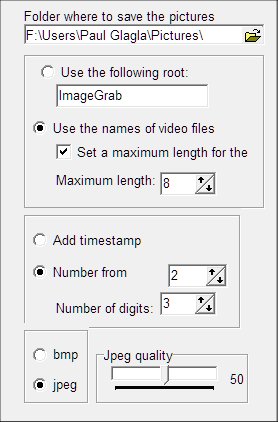
In the panel Settings of the Image, you first select the folder where the images are to be saved.
Then you give a “root” name which will be used to form the name of the file. This root can be fixed (we suggest “ImageGrab” by default) or can be the beginning of the video name, possibly limited to a certain number of characters.
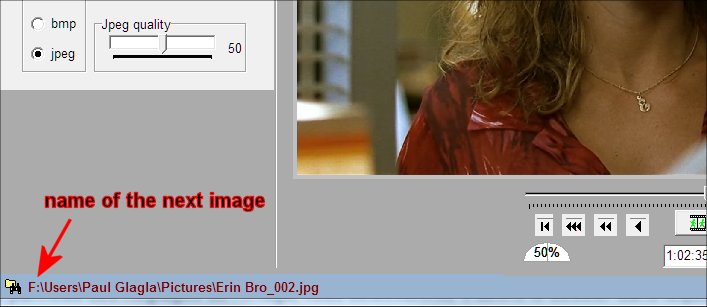
All captured images will be saved until further notice in the designated folder and with a file name starting with this root. To distinguish the files thus produced, you add either the image timestamp or a number to the file name. If it is a number you can set the number of digits, for example if it is 3, the images will be numbered 001, 002 …
Finally, you choose whether the images are saved in bmp or jpg format. If it is jpeg you can choose the quality rate between 0 and 100. The higher it is, the lower the compression will be, therefore the quality will be high but the image size will increase.
To see the effect of your settings, consider the name of the next captured image that appears in the status bar at the bottom of the application. If you click on this name, you access the folder in which the image will be saved.