ImageGrab has a module for executing scripts to automate some of its functions.

To access this module, type F12 which opens the scripts page. You can also use the Script button on the toolbar or the command ?/ Script in the main menu.
On the page that opens you can write a script according to a syntax very close to the Pascal language, since the module is based on the Pascalscript utility of RemObjects. The objective of this documentation is not to give a course on PascalScript. See for example this site on Github if you want to deepen this question. The example scripts that follow below can be an inspiration to adapt them to your needs. But beware, writing scripts is a real programming job that will not be easy for those who have no idea about it. Fortunately they can record macros instead.
The interest of scripts in my software is that they can use procedures allowing to drive the software. The list of these procedures is obtained by typing F1 which opens the help window. Unlike other application windows, this window can remain open permanently, and can be moved on the screen independently of the main window. You can even place it on a secondary screen if you have a workstation that has it.
For example, let’s select OpenFile (CTRL + O) under the ImageGrab tab. Several information is then displayed:
- The name of the procedure, for example OpenFile.
- It is followed by the keyboard shortcut CTRL + O which allows to call the procedure when using the software. This shortcut is not used to write scripts but to manually control the application.
- The hint that is displayed when the mouse passes over a component that activates this procedure. It summarizes the action that the procedure performs.
- The syntax of the procedure, especially if it uses variables. Here:
procedure OpenFile (const aWidestring: widestring);This syntax shows that we must give the procedure a parameter which is a widestring. It will of course be the full name of the file to open, since you have understood at this stage that OpenFile is used to open a video file. - The syntax of the switch in command line mode. This is not used for scripts, but to be able to launch the application in command line mode.
- Possibly an area that can include comments.
With such information using Openfile in a script should be straightforward.
Example 1:
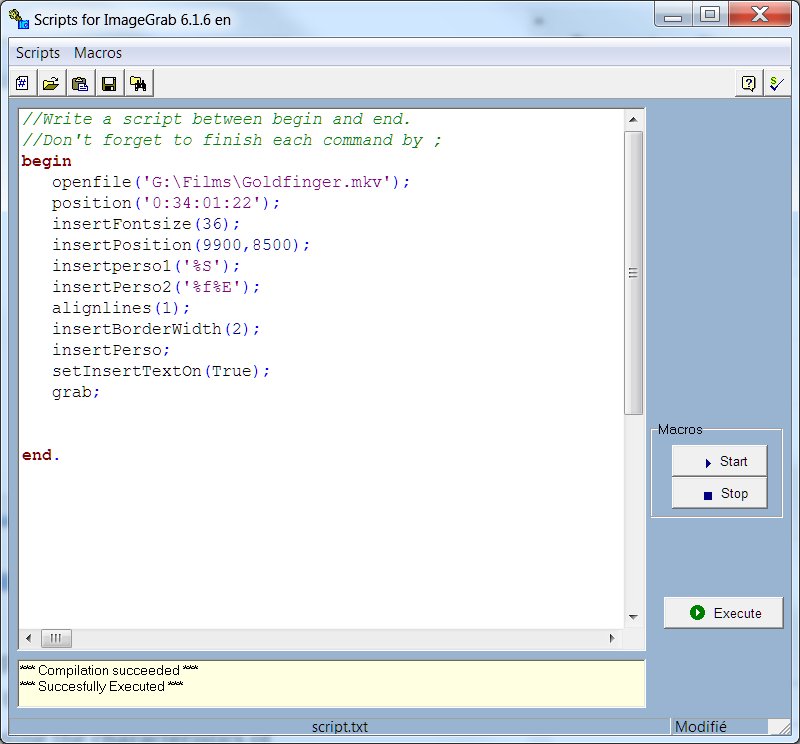
In example 1 we wrote a script which starts by opening a video file with OpenFile, then positions itself at a timestamp of 0: 47: 33: 21 with Position, where we want to capture the image. We then define the characteristics of the insertion, by setting the font size to 36 with InsertFontsize, the position of the overlay at 9,900, 8,500 with InsertPosition (this represents a relative position out of 10,000,10,000, so at the bottom right ). We define a personalized insertion which puts the timestamp on the first line with insertPerso1 (code %S) and the filename with extension on the second line with insertPerso2 (codes %F%E). We align the two lines to the right with alignlines and we set the thickness of the character border to 2 with insertBorderWidth. Then we apply the personalized insertion thus defined with InsertPerso, we activate the insertion with InsertTextOn, and we capture the image with Grab.
Once you have entered all of this in the scripts page, you can execute it by clicking on the Execute button (or F5 shortcut or command menu Macros/execute). Success or failure messages appear at the bottom of the page.
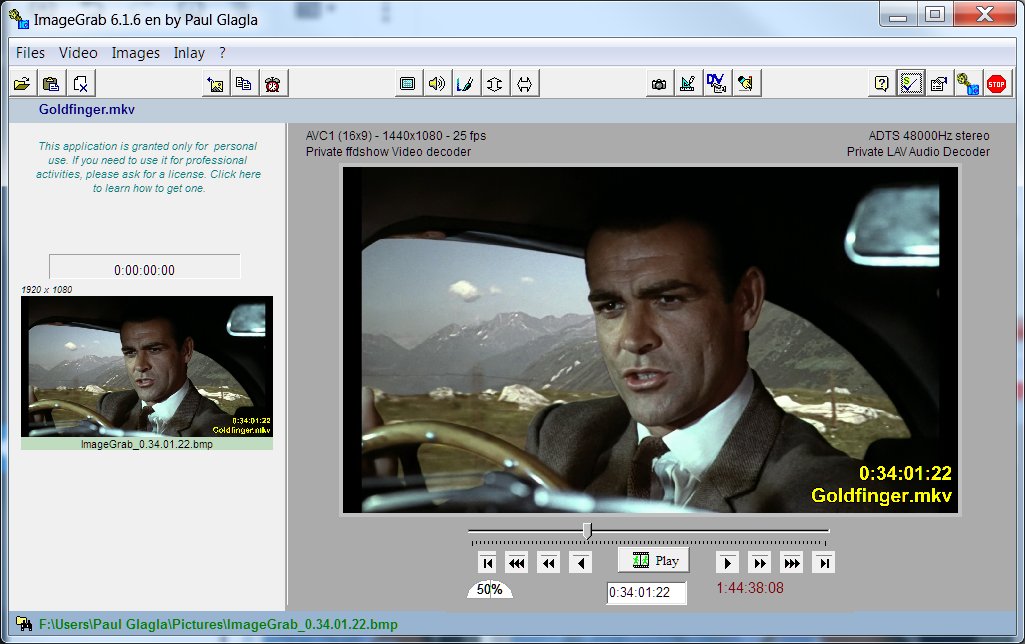
Here we have a successful compilation and execution, and the ImageGrab application gives what we wanted:
Example 2:
Example 1 is only educational to show how one can write scripts. In itself it has little interest and we could have obtained the same result more quickly by proceeding manually.
But all the power of scripts appears when using variables and certain special commands. Example 2 prepares the same inlay as Example 1, but with a transparency of 33% (watermark type) and a white font color. Then it applies it to all the videos which are in a source folder by capturing for each 3 images, at 30 seconds, 1 minute and 1 minute 30. The images are saved in jpeg in a destination folder with a root taken from the name of the file, and then a number between 1 and 3. The jpeg quality is 80%.
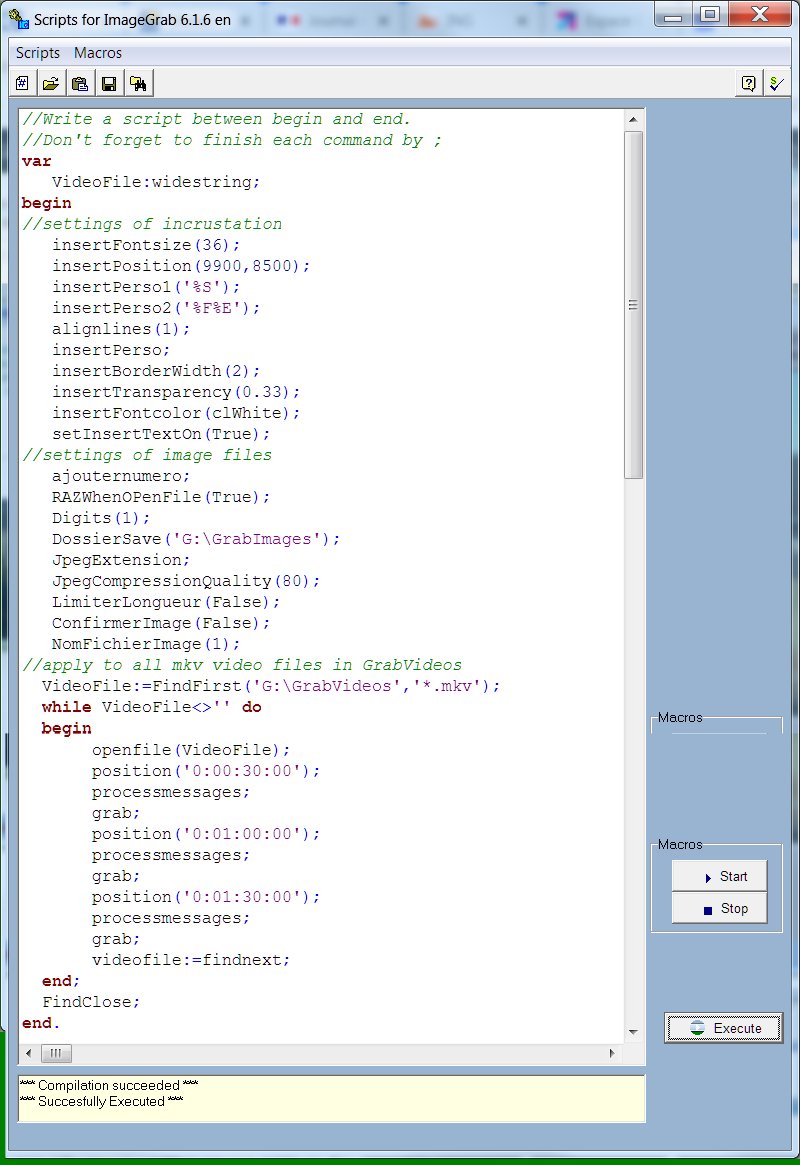
The interest of this example is to observe that we have defined a VideoFile variable and that we use FindFirst, FindNext and FindClose functions to browse all the files in a folder that have a given extension. We will also observe the processmessages procedure which asks Windows to execute the pending messages before continuing. This can be useful for example for the inlay to be updated before capturing an image.
The amateurs of programming in Pascal or Delphi will not be disoriented, even if it is necessary to pay attention to the syntax of each command which is rather particular and does not accept any error, except possibly for the case of the commands where one can put indifferently lowercase and uppercase.