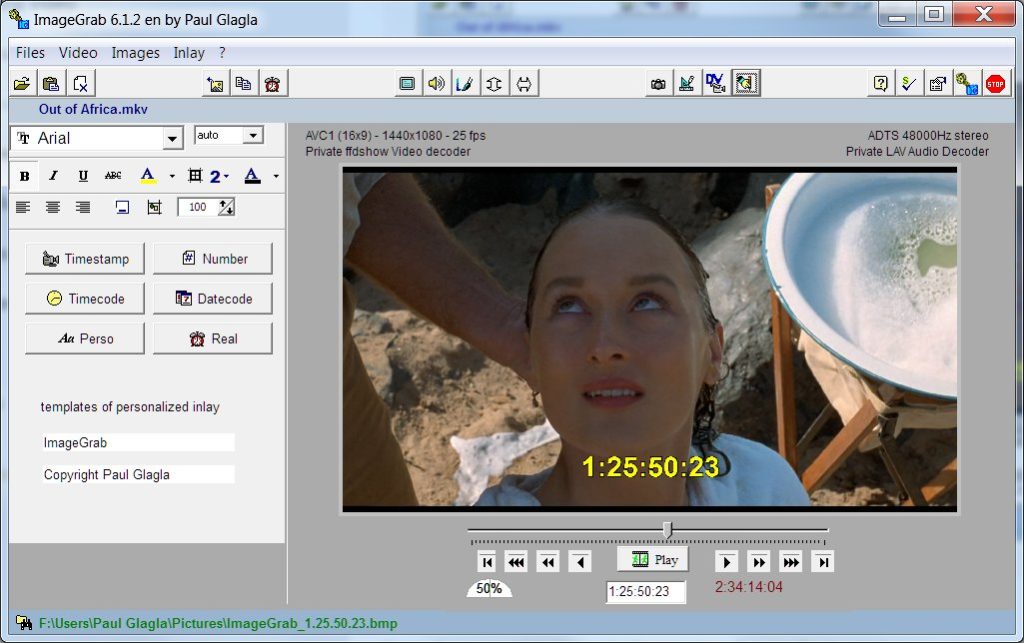
One of the interesting features of ImageGrab is that it can embed text or information in the image. It’s perhaps not good English language, but I am used to call this Inlaying because it’s not just written once on the screen but embedded in the video while playing. You can inlay on two lines. The extracted image will integrate these inlays. These are, if necessary, updated in real time, especially if the video is in Play mode or if you modify the text to be inserted.
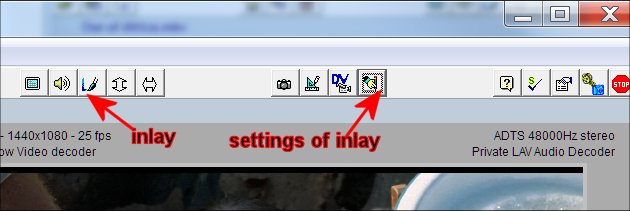
To activate or deactivate the Inlay, type CTL + I, or click on the Inlay button or use the menu command Inlay / Enable inlay or Inlay / Disable inlay.
To define the characteristics of the inlay, you must display the Inlay panel by F6 or by the button for Settings of Inlay or by the menu command Inlay/ Settings of Inlay.
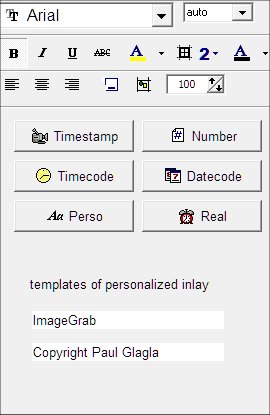
On the first two lines of this panel, we can first define, in a classic way, the font of the inlay, by choosing the name of the font, its size, its style (bold, italics, underlined or crossed out ) and its color. You can request an “auto” size, so ImageGrab will set a default size based on the size of the video.
You can also define the thickness of the border around the characters and its color. The thickness is between 0 (no border) and 5 pixels (large border).
On the third line of the panel we choose the alignment between the two lines of the inlay, either on the Left, or in the Center, or on the Right. A fourth button defines a Subtitles mode which defines a font and a centered alignment in principle suitable for subtitles. At the right of the third line, we can define the possible transparency of the overlay, from 0 (completely transparent, therefore invisible) to 100 (completely opaque).
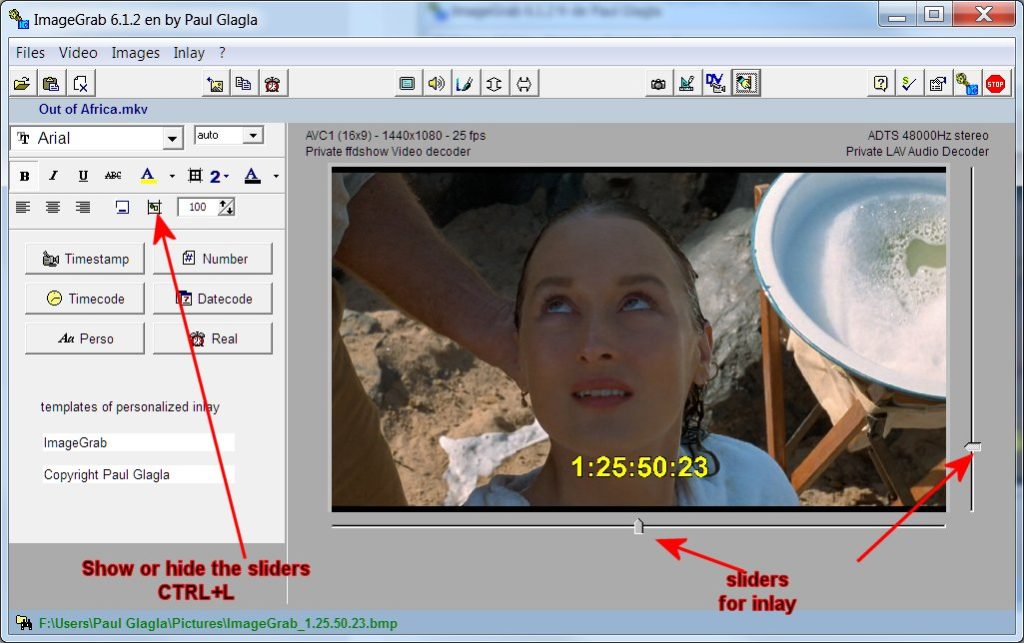
The button before transparency displays the positioning sliders for the inlay. You can move the text with them. When these sliders are visible, then a click on the video also places the inlay at the clicked location. To make the sliders visible or invisible, the shortcut CTRL + L can also be used, as well as the menu command Inlay / Display Sliders or Inlay / Hide sliders.
Attention, the position of the defined inlay is linked to the alignment: if the alignment is on the Left, then the chosen position will define the left of the text. If the alignment is in the Center, the position will indicate the center of the text, and if the alignment is on the Right, it is the right of the text which will be defined by the positioning of the sliders or by the click on the image.
The content of the inlay is defined by larger buttons:
- Timestamp: inlays the timestamp of the image on the first line (CTRL + S)
- Number: inlays the image number on the first line. This is the number possibly added to the file name if you asked for it in the Images panel. (CTRL + N)
- Timecode: only works for DV files. It inlays the timecode of the image on the first line. (CTRL + T)
- Datecode: only works for DV files. It inlays the datecode of the image on the first line. (CTRL + D). Note that this datecode can be modified in the DV videos panel (shortcut F4).
- Perso: inlays two custom lines (see below). (CTRL + P)
- Real: inlays on the first line the real actual date and time when the image was extracted. (CTRL + R).
The personalized inlay can be defined for each of the two lines by indicating a text in which pre-programmed Information can be used by including some of the following codes:
- %D the datecode of the current image (only for DV videos)
- %E the name extension of the current video file
- %F the name of the current video file (without the extension)
- %N the number of the next captured image
- %R the actual date and time when the image is captured
- %S the timestamp of the current image
- %T the timecode of the current image (only for DV videos)
The changes in the personalized inlay will only become effective when you click on the Perso button, or type CTRL + P or use the menu command Inlay / Personalized.
=> Hidden feature: there is a keyboard shortcut CTRL + G to activate or deactivate the anti-Aliasing of inlays. In certain cases, it can smooth the inlaid characters or their border.